
Topics discussed are the following:
-
What is thermoforming?
-
Thick and thin gauge thermoforming
-
The thermoforming process
-
Types of molds
-
Thermoforming methods
-
Materials used in thermoforming
-
Problems and quality issues encountered during thermoforming
Chapter 1: What is Thermoforming?
Thermoforming is the process of heating thin plastic sheets to its forming temperature and stretching it over a mold which takes its shape. After cooling and setting of the molded plastic sheet, each part will be separated from its batch to form a single unit or product. The result of a thermoforming process is a finished product (or part) with a defined three-dimensional characteristic.

Thermoforming is considered a secondary molding process; the primary process being that which produces the sheet or film with a uniform cross-section (i.e. extrusion). The forming phase happens in a mold cavity when the plastic sheet is drawn by air and/or vacuum pressure. The mold cavity contains the shape of a single part. The mold tool, sometimes referred to as “tooling”, is a collection of mold cavities.
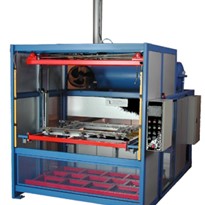
Because the steps in thermoforming are simple and straightforward processes, this process is suitable for high-volume manufacturing of molded products due to its fast turnaround time. Thermoplastic sheets, the starting material, are continuously fed in the heating chamber and formed into the desired shape. In some operations, the extrusion machine which produces the thermoplastic sheet is placed upstream of the thermoforming machine, thus less heat will be needed. Manufacturing set-ups are often designed to produce multiple parts with each stroke of the press using molds with multiple cavities.
Chapter 2: Thick (Heavy) Gauge and Thin Gauge Thermoforming
Depending on the manufactured part thickness, thermoforming is classified into two categories, thick gauge, and thin gauge thermoforming. Each category requires different type of machinery and technique:
Thick gauge (or heavy-gauge) thermoforming
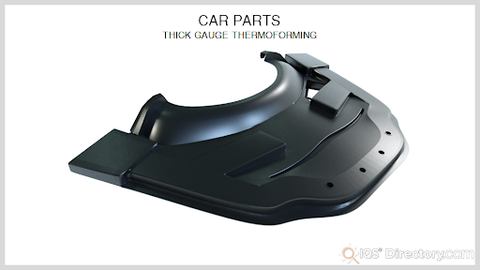
Thick gauge (or heavy-gauge) thermoforming produces parts from 0.125” – 0.500” thickness. Cut sheets of thermoplastics are the starting material, which is clamped and indexed in a heating equipment. This category is used to create thicker and more durable parts that have permanent end-applications.
Thin gauge thermoforming
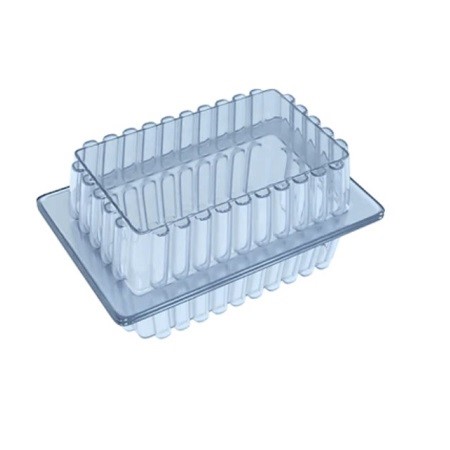
Thin gauge thermoforming produces parts with thickness less than 0.060”. Thermoplastics are either roll-fed into the equipment or may come from an upstream extrusion process. Thin gauge thermoforming, as the name suggests, produces very thin products; typical applications of this method are packaging products which are disposable and recyclable.

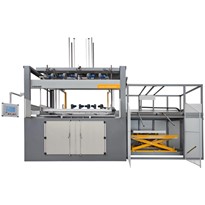
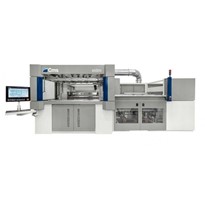
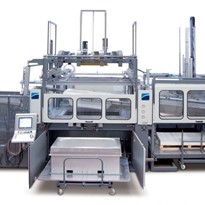
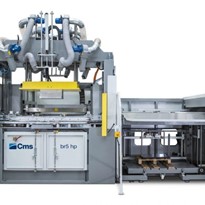
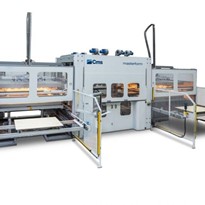
Chapter 3: The Thermoforming Process
This section presents the stages involved in the thermoforming process.
Heating
Plastic sheet to be molded, which has length and width greater than the finished product, is clamped into a holding device and transported into a heating equipment to raise it to the forming temperature. The sheet is heated by contact heating using panel and rods (conduction), by exposing to circulating hot air (convection), or by using infrared heaters (radiation). Such heating systems must be carefully designed in order to achieve uniform sheet temperature.

Forming temperature is arbitrary, depending on which type of thermoplastic is used, application of the finished part, and forming technique which will be employed. This is one of the most important operating parameters in thermoforming to meet certain quality standards. Take note that the true forming temperature of a sheet is its core temperature, not its surface temperature. Hence, it is important to calculate heat transfer across the sheet.
When it comes to the variation of temperature across the sheet, the 10-10-5 rule must be met. The first 10 applies to the 10 locations on sheets where the temperature must be known; this includes the four corners and centers of both sides. The next 10 refers to allowable variance of 10°F among the 10 locations. Five (5) means that the temperature on both sides of the sheet in each of the 10 locations has an allowable variance of 5°F. The 10-10-5 rule applies to heating, forming, and cooling to achieve optimal thermoforming.
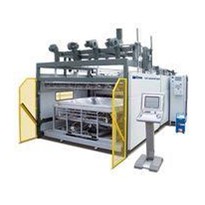
Forming
Heated plastic sheets are removed from the heating equipment and transported to a temperature-controlled and pre-heated mold tool. At this stage, the plastic sheet takes the shape of the mold cavity which contains the desired form of the finished product. This stage gives the product its three-dimensional characteristics (length, width, and height).
The mold tool may be a positive or a negative tool, depending on its form:
Positive Tool
Positive Tool, or “male mold” is convex-shaped – the heated plastic sheet is positioned above the convex tool. The “humped surface”, or the convex surface will now give the plastic sheet its final shape. The exterior surface of a positive mold tool will give the shape of the inner surface of the part.

Negative Tool
Negative Tool, or “female mold”, on the other hand, is concave-shaped. The interior surface contour of a negative mold tool will give the shape of the outer surface of part.

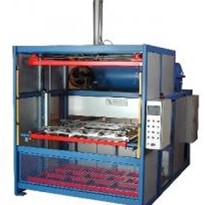
After forming, the plastic containing the new shape solidifies by cooling using air circulation or liquid cooling systems. The tool material used significantly affects the cooling cycle, thus also affecting the quality of the parts.
Other additional shaping steps are involved, especially in thick gauge thermoforming, such as drilling, cutting, or finishing.
Trimming
The sheet containing the formed parts goes through a trim station, wherein a die, abrasive wheel, or circular saw cuts the parts in order to be separated from other parts from the sheet web. Remaining plastics after the trim process may be recycled similar to the starting material and reprocessed to form other parts.
Chapter 4: Types of Molds
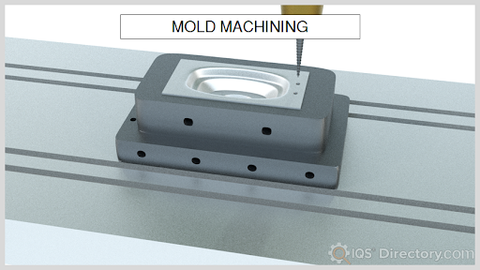
The mold cavity to be used in the forming step is carefully designed by the manufacturer to create the required profile of the finished product, depending on the customer needs or end-user application. Initial stages in the development of a mold tool involves detailed drawings in the CAD software and CNC program to realize the desired patterns. Some of the materials used to create the mold tool are the following:
-
Wood
An inexpensive type of tooling material, wood can be shaped fairly easily hence the manufacturer can readily make complex designs or make changes on the details of the part. However, it poses many disadvantages: uneven and lengthy cooling (since wood is an insulator), has moisture which can cause voids and it can transfer wood grains to the part. Tooling made from wood is commonly used as prototypes to create commercial mold.
-
Fiberglass
Like tooling from wood, fiberglass is also an economical permanent mold tool if a manufacturer only produces lower volume parts. However, the cooling cycle is two to three times longer than a temperature-controlled mold.
-
Aluminum
Aluminum provides an excellent temperature control which leads to shorter cycle times and excellent quality parts:
-
Cast Aluminum
Cast Aluminum tools are derived from the wood prototype.
-
Fabricated Aluminum
Fabricated Aluminum tools are made from a single or multiple aluminum blocks that are honed and cut to produce the mold. The fabricated tool is costly but more accurate in terms of dimensions and the manufacturer can make more complex designs.

Chapter 5: Thermoforming Methods
The following are the common forming methods.
Vacuum forming
A vacuum is generated underneath the sheet to draw the plastic sheet against the mold cavity until it takes its desired shape. In some production set-up, the sheet is heated before it is stretched (called “Drape Forming”). Vacuum forming is the simplest of all thermoforming methods. However, part thickness distribution is difficult to control. Vacuum pressure should be uniform and sufficient throughout the mold.

Pressure forming
Similar to the vacuum forming method, an air pressure is utilized together with the vacuum applied under the cavity to push the plastic sheet. The added air pressure creates greater detail (e.g. textured surfaces, undercuts and sharp corners) on the finished product, which is not easily created by vacuum forming, making this method suitable for products with complex designs.
Mechanical Forming
The thermoplastic sheet is pushed into or around the mold cavity, by mechanical force using a combination of a positive and negative tool. This method is suitable if the part requires surface detailing on both sides of the part; also offers a better dimensional and part thickness control compared to vacuum and pressure forming. However, this is costly since two mold halves are operated and maintained.

Twin Sheet Forming
Twin sheet forming involves two plastic sheets simultaneously heated and formed using two mold tools for each halves of the parts. Mold tools are then precisely pressed together on the edges to connect the two halves. This method is used in producing double-walled three-dimensional parts and hollow tubes such as air ducts, pipes, and tanks.

Chapter 6: Materials Used in Thermoforming
Thermoplastics are the raw material of the thermoforming process. Thermoplastics are a broad class of polymers which can be heated at a certain elevated temperature and re-casted reversibly, without altering its chemical properties and an associated phase change. It can survive multiple cycles of heating and cooling. Given this nature, thermoplastics can be reprocessed, and are recyclable materials. Only thermoplastics can be thermoformed. Thermosetting and elastomeric plastics, in contrast, cannot be reshaped once the polymeric chains have been cross-linked.

Forming temperature is any point located above the glass transition temperature and below its melting temperature. When the temperature of a thermoplastic is increased gradually, the intermolecular forces in the polymeric chains are also weakened gradually. Until it reaches the glass transition temperature. Above the glass transition temperature, the once rigid and brittle solid is turned into a soft and pliable rubber-like material. The reverse of this transition is a supercooling of the thermoplastic called vitrification.

Thermoplastics are grouped into amorphous and semi-crystalline.
Amorphous Thermoplastics
These materials have a random molecular structure and wide range of softening temperature. Most of the amorphous thermoplastics are transparent. Advantages of amorphous thermoplastics are good dimensional stability, impact resistance, bonding well with adhesives, and being easier to thermoform than semi-crystalline thermoplastics. However, they have poor fatigue resistance and are prone to stress cracking. Some of the amorphous thermoplastics are polycarbonate, acrylic and high impact polystyrene.

Semi-crystalline Thermoplastics
These exhibit an organized lattice at a temperature lower than its melting point. They have a sharp melting point. This type is known for its excellent wear and bearing resistance, making it ideal for structural applications and durable plastic parts. This type is also known for its better chemical resistance and insulation properties. Disadvantages of this type are difficult thermoform and/or bond with other formed parts, and only an average impact resistance. Examples of semi-crystalline thermoplastics are polyethylene, propylene, and nylon.

Chapter 7: Problems and Quality Issues Encountered During Thermoforming
Just like other molding techniques, thermoforming does not guarantee a defect-free process. The key to successful thermoforming is proper tool management and design. Uniform temperature on all materials and tooling must be achieved. Cleanliness of all tooling (i.e. free from moisture and plastic build-up) must also be maintained to prevent contamination-related defects.
Parameters that need to be optimized and controlled in every thermoforming process are the following:
- Forming temperature
- Mold tool temperature
- Vacuum and/or air pressure
- Liquid or air coolant flow rate and temperature

Note:
- When adjusting the forming temperature, ensure that it is still between the forming and the melting temperatures.
- Part thickness distribution may be improved through pre-forming of the plastic sheet before it is drawn to the mold cavity.
Conclusion:
- Thermoforming is the process of heating thermoplastics to their forming temperature and drawing them over a mold cavity wherein it takes on three-dimensional characteristics.
- Thermoforming has a wide range of applications.
- Thermoforming is grouped into two categories depending on the sheet thickness of the formed part: thick gauge thermoforming (0.125” – 0.500”) and thin gauge thermoforming (less than 0.060”).
- The first step in the thermoforming process is heating of a plastic sheet to its forming temperature. The forming temperature is arbitrary to most manufacturers.
- Forming stages gives the three-dimensional characteristics (length, width, and height) to the once flat sheet. Forming methods may be vacuum forming, pressure forming, mechanical forming and twin sheet forming. Afterwards, formed parts are trimmed from the sheet web.
- Thermoplastics in the form of sheets are the starting material of the thermoforming process. These plastics can survive cycles of heating and cooling, allowing them to be recycled. Thermoplastics may be amorphous and semi-crystalline.
- Forming temperature is the temperature above the glass transition and below the melting temperature.
- The mold may be a positive or negative tool, and its material significantly affects the heat transfer across the sheet.
- Parameters to be optimized and controlled are forming temperature, mold tool temperature, vacuum and/or air pressure, and liquid and/or air coolant temperature.
- Proper tool management and temperature control is the key to successful thermoforming.
*This article is reproduced curtesy of IQS Directory