
Pre-Start Lifting Gear Inspection: A 5-Minute Daily Checklist That Prevents Incidents
Why “5 Minutes” Beats “Hope for the Best”
If lifting gear had a voice, most of the incidents we hear about would start with the same sentence: “I thought it looked okay.” And honestly, that’s a very human mistake. When you’re rushing to get the job moving, a shackle is “basically fine,” a sling tag is “probably readable,” and that hook latch is “close enough.” The problem is: lifting gear doesn’t fail politely. It fails suddenly, loudly, and at the worst possible time—usually when the load is already off the ground and everyone’s committed.
A 5-minute pre-start inspection isn’t about becoming a rigging detective or turning the morning into a full-blown audit. It’s about catching the obvious, repeatable red flags that show up before something goes wrong: a bent pin, a cracked hook, a cut in a synthetic sling, a missing tag, corrosion that’s moved from “cosmetic” to “structural,” or a chain link that’s starting to stretch. Those are the little clues that, if you ignore them, can become a major incident with downtime, damage, paperwork, and injuries.
Think of this check like brushing your teeth. You don’t do it because you love toothbrushes—you do it because the alternative is expensive and painful. Same deal here. A daily pre-start check costs minutes. A dropped load costs weeks (and sometimes far worse). The best part? Once you’ve got a routine, it stops feeling like “extra work” and starts feeling like the easiest insurance policy you’ll ever buy.
What a pre-start inspection actually catches
A lot of people assume inspections are for “big” defects only—like something snapped in half. But daily checks are most powerful at catching early-stage issues. That’s where the value lives. You’re looking for the stuff that creeps in gradually: wear, deformation, missing parts, damaged tags, and environmental damage.
Here’s what daily checks commonly catch in the real world:
- Mis-matched components (wrong pin for the shackle, wrong sling for the job, or a random “temporary” fix that became permanent)
- Damage from yesterday’s lift (shock loading, dragged slings, side-loaded shackles)
- Tag and ID problems (no WLL visible, unreadable serial, missing inspection status)
- Small cracks and distortion that you won’t notice once everything is under tension
- Chemical, heat, or UV damage that hits synthetic slings especially hard
- Corrosion that’s moved past surface rust into pitting or section loss
The key is consistency. If you do the same check the same way every day, your eyes get trained. You start noticing “what changed.” And noticing what changed is how you stop incidents before they start.
The hidden cost of skipping the daily check
Skipping a daily check rarely feels like a decision. It feels like a shortcut. “We’ve used this sling all week.” “It passed inspection last month.” “We’re only lifting it a metre.” That’s exactly why it’s dangerous—it slides in quietly.
The hidden costs stack up fast:
- Unplanned downtime: a failed lift stops everything—people, plant, and schedule.
- Damage to the load and surrounding assets: one dropped component can wreck far more than the gear that failed.
- Investigation and paperwork: even a near miss can trigger a chain reaction of reporting and reviews.
- Reputation and trust: crews remember which teams lift safely and which teams “roll the dice.”
- Real harm: the load doesn’t care who’s standing nearby when it comes down.
Bottom line: the daily check is the cheapest, easiest control you’ve got. It’s not about perfection. It’s about making “safe enough” actually safe.
Your 5-Minute Inspection Mindset
Let’s make this simple: your goal is not to prove the gear is perfect. Your goal is to catch anything that makes the gear not safe to use today. That’s a different mindset. You’re scanning for “no-go” issues, not trying to measure microscopic wear with a ruler while the crew waits.
A good pre-start inspection is quick because it’s structured. When people take too long, it’s usually because they’re bouncing around: checking a hook, then a sling tag, then back to the shackle, then wondering what they’ve already looked at. Structure turns chaos into a rhythm.
Here’s the rhythm you want:
- Stop: pause the job for a moment and commit to the check.
- Look: do a visual sweep for obvious defects.
- Touch: run your hands along key surfaces (you’ll feel burrs, cuts, and distortion).
- Tag: confirm identification, WLL, and inspection status.
- Decide: use it, quarantine it, or escalate.
This mindset also helps with group dynamics. If you make the check a normal part of the start-up, nobody feels like the “slow one” for speaking up. It becomes the culture: we check first, then we lift.
Stop–Look–Touch–Tag: the simple routine
Stop means you create a micro-break in momentum. That’s important because most bad decisions happen when you’re already rushing.
Look is your fast scan—cracks, bends, missing parts, heavy corrosion, obvious cuts.
Touch is where you catch the sneaky stuff: sharp edges on hardware, wire rope “meat hooks,” heat glazing on synthetics, or a latch that feels sticky. Gloves help, but don’t let bulky gloves hide what your hands could detect. If you can’t feel it, slow down and look closer.
Tag is non-negotiable. If you can’t identify the gear properly—its WLL, its configuration, its inspection status—you’re basically guessing. And guessing with suspended loads is a bad hobby.
When this routine becomes muscle memory, the “5 minutes” is real. You’ll be surprised how fast it goes once you stop improvising.
When to quarantine gear immediately
If you’re ever thinking, “Maybe it’s okay,” that’s usually your cue to quarantine and escalate. Daily checks are not the time to debate borderline defects.
Quarantine immediately if you see:
- Cracks (any crack is a hard stop)
- Deformation (bent, twisted, stretched components)
- Missing or illegible ID/tag (no WLL = no lift)
- Latch not closing or not operating properly
- Severe corrosion/pitting that looks like it has “eaten” into the metal
- Cuts, burns, melting, or chemical damage on synthetic slings
- Broken wires or severe kinks on wire rope slings
- Improvised repairs (welds, bent pins “straightened,” taped tags, random bolts)
The rule of thumb: if you wouldn’t confidently bet your hands on it, don’t lift with it.
Before You Touch the Gear: Set Up a Safe Inspection Zone
A pre-start inspection goes faster—and catches more—when you’re not trying to do it in the worst possible conditions. If the gear is lying in mud, coiled under a pallet, or half hidden in the back of a ute, you’ll miss things. Not because you’re careless, but because you’re human.
Set up a tiny “inspection zone.” You don’t need a fancy workshop. You need three things: space, light, and a clear load path.
- Space: lay slings out flat where you can see their whole length. If you can’t lay them out, you can’t inspect properly—especially synthetics and wire rope.
- Light: good lighting reveals cuts, fraying, corrosion, and cracks. Shadows hide problems.
- Clear load path: keep inspection away from moving plant and foot traffic so you’re not distracted or pressured.
This also reduces the “I’ll just use it” temptation. When gear is stored neatly and checked in a consistent place, it’s easier to notice what’s missing, what’s damaged, and what doesn’t belong.
Lighting, access, and keeping the load path clear
If you’re inspecting outside, use the sun to your advantage—turn the sling so light hits the fibres or wire strands. Inside, a basic handheld light is worth its weight in gold. A quick angle change can reveal a crack that’s invisible straight-on.
Access matters too. If a shackle pin is jammed, don’t force it with brute strength while the crew waits. That’s how threads get damaged and people get hurt. Move it to a safer spot, clean it, and make a proper call.
Keeping the load path clear is also about mindset: inspection is part of the lift plan, not an afterthought. If your inspection area is constantly in the way, you’ll start skipping steps. Make it easy to do the right thing.
What PPE helps you inspect better (not just safer)
PPE isn’t just a safety checkbox—it can make you a better inspector.
- Gloves: choose gloves that let you feel texture. If they’re too thick, you won’t notice burrs or broken wires.
- Eye protection: helps when you’re checking wire rope or chain close-up; little metal burrs are not friendly.
- A rag and mild cleaner: wiping grime off a tag or a shackle shoulder often reveals defects.
- A marker and a “quarantine” tag: so you can clearly identify gear that’s out of service.
- Phone camera: photos help when escalating to a supervisor or inspector—especially for borderline defects.
The goal is simple: make defects easier to see and easier to report.
The Daily Checklist (Do This in Order)
This is the heart of the article: a practical checklist you can run in under five minutes once you’ve got the habit. The trick is to go in the same order every time, so you don’t miss anything and you don’t waste time.
1) Tags, ID, and paperwork basics
Start with identification, because it stops you from making the most common mistake: using the wrong gear for the lift.
Check:
- Is the tag present and readable?
- Is the WLL clearly stated for the configuration you’re using?
- Does the serial/ID match your site system (if applicable)?
- Is the gear within inspection/test date requirements for your site?
- Any signs of tampering? (taped tags, handwritten changes, makeshift labels)
If you can’t confirm WLL or identity, stop. This isn’t “admin.” It’s the basis of capacity. Lifting gear without a readable tag is like driving a truck with no brakes rating—you might get away with it until you don’t.
Quick tip: if tags are constantly getting damaged, look at storage and handling. Tags don’t usually “randomly” become unreadable. They get rubbed, crushed, soaked in chemicals, or dragged. Fix the cause, not just the symptom.
2) General condition scan (the 10-second sweep)
Now do your fast scan. Hold the gear up (safely) or lay it out and look for:
- Obvious deformation: bends, twists, stretched links
- Cracks or sharp notches
- Heavy corrosion or pitting
- Missing components: latch, pin, retaining clip
- Heat discoloration: bluing, scorch marks, glazing
- Contamination: cement, paint, chemicals, oil-soaked synthetics
This is where you catch the “how did nobody notice that?” issues. The 10-second sweep is also where you notice if the gear just looks… tired. Trust your eyes. If it looks wrong, it might be wrong.
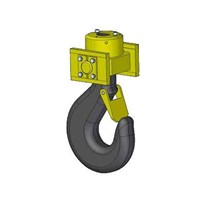
3) Hooks and latches
Hooks are deceptively simple. They’re also a common failure point when abused, side-loaded, or used without a properly functioning latch.
Check:
- Hook body: any cracks, wear, gouges, or deformation.
- Hook throat opening: if it looks “stretched,” that’s a red flag. A hook that has opened up has been overloaded at some point.
- Swivel function (if applicable): should move smoothly without binding.
- Latch condition: it should close fully and spring back properly.
- Latch pin and spring: no missing parts, no bent latch, no sticky movement.
A latch doesn’t carry the load, but it does prevent the sling from jumping out when the lift shifts, slack develops, or the rigging angle changes. A broken latch is not “optional.” It’s a warning that the hook has seen rough handling—and rough handling usually leaves other damage behind.
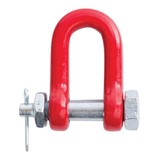
4) Shackles and pins
Shackles are everywhere, which is exactly why they get abused. Side loading, mismatched pins, damaged threads, and “close enough” fit-ups are the classics.
Check:
- Shackle bow and ears: look for deformation, cracks, elongation, deep wear.
- Pin threads: should be clean, not cross-threaded, not stripped.
- Pin seating: should seat properly, not jam, not wobble.
- Correct pin: ensure it’s the right pin for that shackle (no random bolt substitutes).
- Signs of side loading: distortion or uneven wear can hint the shackle has been loaded incorrectly.
A good habit: if you have to force the pin, something’s wrong—dirty threads, damage, or misalignment. Forcing it is how small issues become big ones.
5) Chain slings and components
Chain slings are tough, but they’re not invincible. They hide damage well because they still “look strong” even when they’re stretched or worn.
Check:
- Links: look for wear flats, nicks, gouges, corrosion, or stretched links.
- Elongation: if links look longer or “pulled,” quarantine.
- Master links and sub-links: wear, deformation, cracking.
- Shorteners and clutches: ensure they’re not bent, cracked, or sticking.
- Hooks on chain sling legs: same hook checks as above.
Chain also gets heat damage. If the chain has been exposed to high heat, it can lose strength without looking dramatically different. Discoloration, scaling, or “cooked” appearance is a reason to escalate.
6) Wire rope slings
Wire rope slings can look fine until you run your hand along them and find the dreaded “meat hooks” (broken wires). They also hate kinks, crushing, and improper storage.
Check:
- Broken wires: any cluster of broken wires is a serious concern—quarantine and escalate.
- Kinks and birdcaging: these are structural issues, not cosmetic.
- Crushing/flattening: from being run over or pinched.
- Corrosion: especially at the eyes and under thimbles.
- Ferrules and splices: no cracks, no slippage, no deformation.
- Thimbles: seated properly, not worn through.
Wire rope damage is often easiest to see when you rotate the sling and flex it slightly (without forcing it). Broken wires pop out visually.
7) Synthetic webbing and round slings
Synthetic slings are brilliant—lightweight, flexible, and often ideal for delicate loads. But they’re also the most commonly damaged by sharp edges, heat, UV, and chemicals.
Check:
- Cuts and tears: even small cuts can reduce capacity.
- Abrasion: fuzzy fibres, worn patches, thinning areas.
- Heat damage: glazing, melting, hard shiny spots.
- Chemical damage: discoloration, brittleness, swelling, softening.
- Stitching: broken stitches, pulled threads, damaged seams (especially on web slings).
- Sleeves and covers: if the cover is damaged, assume the core may be compromised.
If you can see the load-bearing fibres are damaged, it’s a no-go. Don’t “just use it for a light lift.” That’s how slings fail unexpectedly.
8) Hardware: eyebolts, turnbuckles, master links
Small hardware causes big problems because it’s easy to overlook.
Check:
- Eyebolts: correct type for the load direction; no damaged threads; shoulder seated properly (where applicable).
- Turnbuckles: no bent bodies; threads engaged adequately; safety wire/locking method used if required.
- Master links: wear, deformation, cracks.
- Quick links/connectors: correct rating and condition; no “hardware store” substitutes.
The big trap here is mixing rated lifting hardware with general-purpose fasteners. If it’s not rated for lifting, it doesn’t belong in the system.
9) Edge protection and softeners
Edge protection is one of the most underrated controls in lifting. People spend time choosing the perfect sling, then run it over a sharp edge like they’re slicing bread.
Check:
- Edge protectors: cracks, wear-through, missing sections.
- Softeners/padding: still positioned correctly; not soaked in chemicals; not torn.
- Contact points on the load: burrs, sharp corners, weld spatter—anything that can cut fibres.
If the load has sharp edges, edge protection isn’t optional. It’s the difference between “lift completed” and “sling cut mid-air.”
10) Storage and transport damage checks
Most gear doesn’t get damaged during the lift—it gets damaged between lifts. Dragged across concrete. Thrown into a toolbox. Left in the rain. Run over. Packed under heavy items.
Check:
- Signs of crushing: flattened wire rope, distorted shackles.
- Dirt and grit: acts like sandpaper on fibres and moving parts.
- Moisture exposure: rust, stiff fibres, mold/mildew on synthetics (a sign of poor storage).
- Chemical contamination: especially in workshops and industrial sites.
Good storage is part of inspection. If you fix storage, your gear lasts longer and your inspections get easier.
Simple Quarantine Rules: What Gets Taken Out of Service
Quarantine doesn’t mean you’re dramatic. It means you’re disciplined.
Red flags you never ignore
- Any crack on metal components
- Any significant deformation (bent, twisted, stretched)
- Missing or unreadable tag/ID
- Latch not functioning
- Severe corrosion/pitting
- Synthetic sling cuts, burns, melted fibres, chemical damage
- Wire rope kinks, birdcaging, heavy broken wires
- Damaged threads on pins, eyebolts, or turnbuckles
- Unknown history gear (found in a corner, no ID, no record)
How to tag out gear so it doesn’t sneak back in
- Remove from the work area immediately.
- Attach a clear quarantine tag.
- Write the reason in plain language.
- Record the ID/serial (or take a photo if the tag is damaged).
- Store in a designated quarantine spot.
- Escalate to the right person.
Logging out-of-service gear in LIFTIQ for better management
When an item is taken out of service, logging it in LIFTIQ helps stop it from quietly reappearing later. Instead of relying on someone’s memory (or a tag that can fall off), you can record the status and keep the whole team aligned.
Practical ways to use LIFTIQ:
- Mark the item as “Out of Service” as soon as it’s quarantined
- Add the reason (cut fibres, latch failure, bent pin, missing tag, corrosion, etc.)
- Attach photos of the defect and the ID/tag (where available)
- Assign an action like “Send for inspection,” “Repair/replace,” or “Dispose”
- Track location (quarantine cage, stores, workshop) so it doesn’t disappear
- Improve visibility for supervisors/stores so replacement gear can be organised faster
Conclusion
A 5-minute pre-start lifting gear inspection is one of the simplest ways to prevent incidents, because it catches the everyday defects that lead to dropped loads: missing tags, damaged latches, bent pins, worn links, cut fibres, and more. When something fails the check, the job isn’t finished once you slap on a quarantine tag—logging it as Out of Service in LIFTIQ helps manage the item properly, track actions, and stop it returning to the gear pile by mistake.
FAQs
1) How long should a pre-start lifting gear inspection take?
Around five minutes for a typical kit once the routine is established.
2) Can I use gear if the tag is missing but I know what it is?
No—quarantine it and manage it properly (including logging it in LIFTIQ if that’s your system).
3) What’s the most commonly missed defect?
Hook latch issues and early damage on synthetic slings.
4) Should we record daily checks?
If possible, yes—keep it simple, and record out-of-service items in LIFTIQ for clear traceability.
5) What reduces sling damage fastest?
Better edge protection and better storage/handling.


-160x160-state_article-rel-cat.png)


-205x205.jpg)